Connecting your IYS store via Social Media
Connecting your IYS store via Social Media
In this process, we will look at configuring a Merchant’s online store via a Social Media Platform.
For this example, we will be setting up an iVeri Demo store via Facebook.
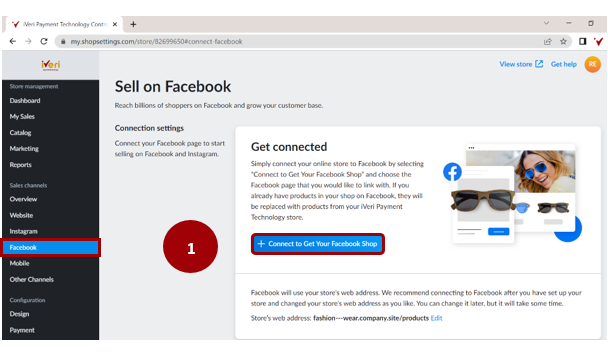
1. From the menu, the Merchant would need to select which social media platform they would like to configure.
Click on the tab ‘Connect to get your Facebook Shop’.
Note: In order to link your account your Social media page requires a Business Manager account as well as a catalogue of products.
2. The next step would be to use your social media login credentials to connect to your selected Social media platform.
Click on ‘Continue’.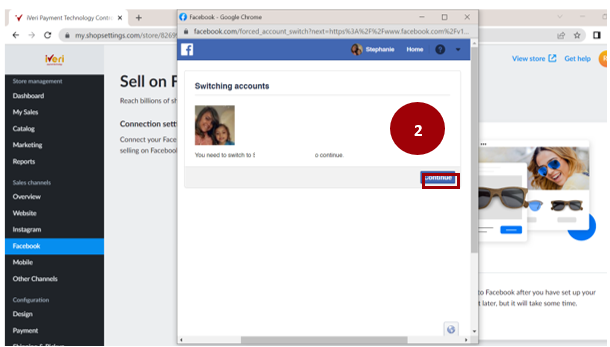
Note: It is important that you have a Business Account / Profile setup on your social media platform.
Click on ‘continue as’ (this would appear as your social media account name).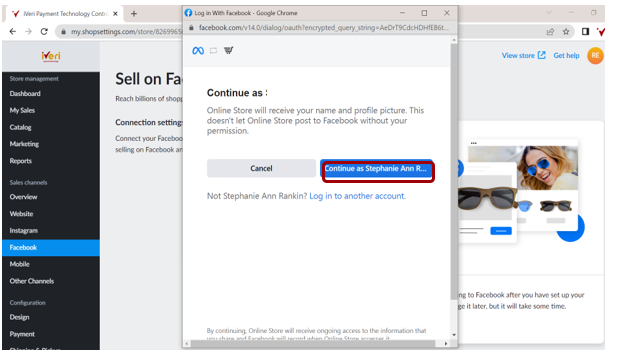
3. Now that you have successfully logged in, the Merchant will provide IYS access to post Ads and link products to your social media shop.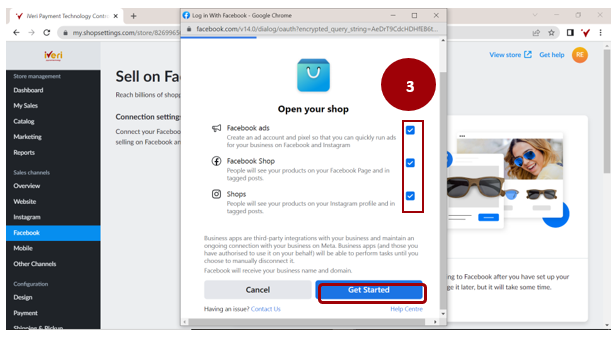
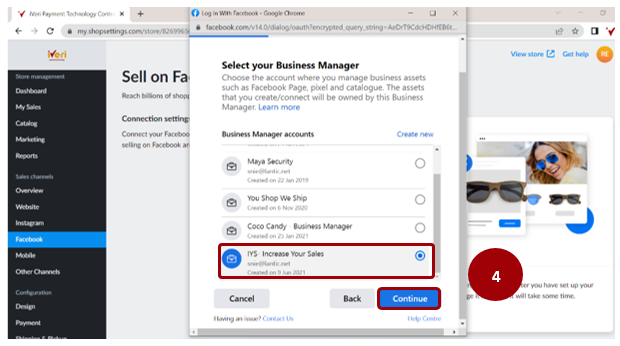
4. The Merchant would need to select the Business Manager Account where they manage their business assets (catalogue, Facebook page etc.)
If you have more than one Business Manager Account, please select the correct account that you would like to link.
Once you have made your selection, Click on ‘Continue’.
5. Here the Merchant will link their Business Facebook Page to their IYS store.
This will allow the Merchant to display products from their shop on their Facebook Page.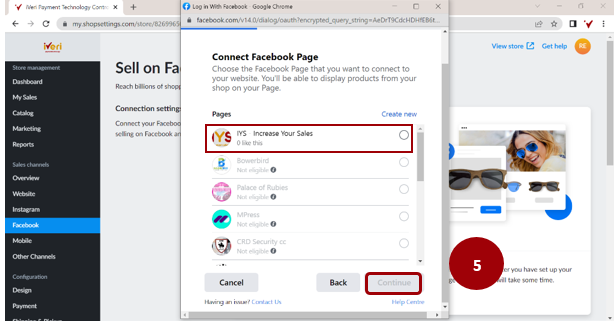
If the Merchant has an Instagram Business account, they would be able to add and link their profile to Instagram in the same setup.
If the user would like to skip connecting their Instagram, select to ‘Skip connecting to Instagram’.
Click on ‘Continue’ to proceed to the next step in the process. 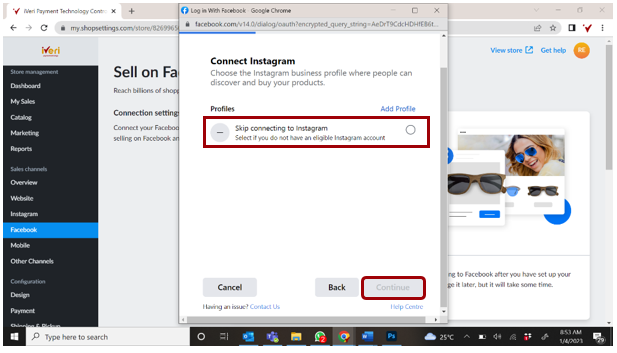
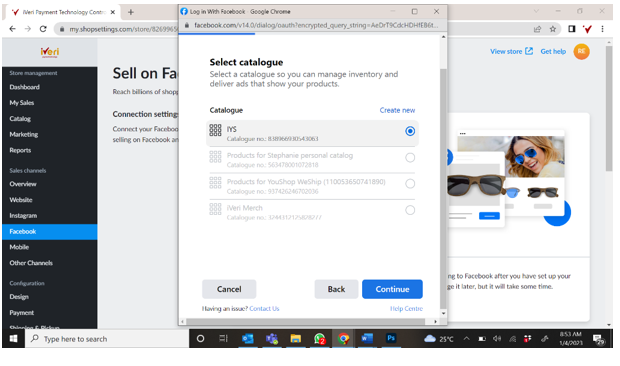
6. In this step, the Merchant will select the catalogue the would like to manage inventory for and Ads that need to be delivered for their select product.
Once the Merchant has selected their Catalogue, click on ‘Continue’.
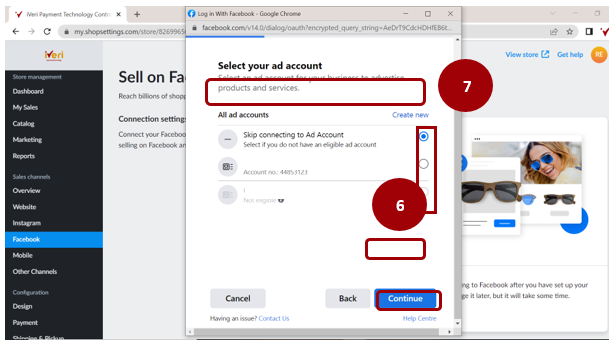
7. Select the ad account for the business you would like to advertise products and services.
Once the Merchant has selected their ad account, click on ‘Continue’.
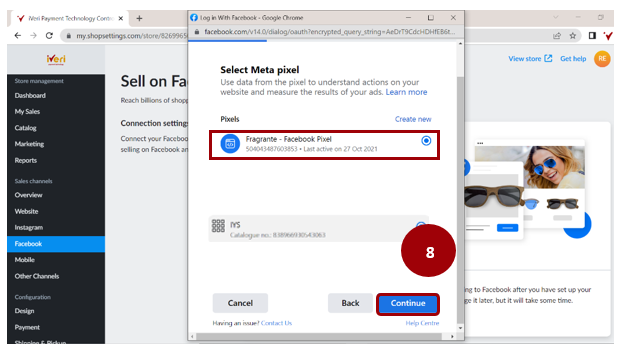
8. The Merchant is able to use data from the pixel to gather information regarding actions on their website from potential customers and measure results from the Ads they have posted.
Once the Merchant has selected the Meta Pixel, click on ‘Continue’.
9. Enter the commerce account name that will feature your products across your social media platforms.
Once the Merchant has selected their Catalogue, click on ‘Continue’.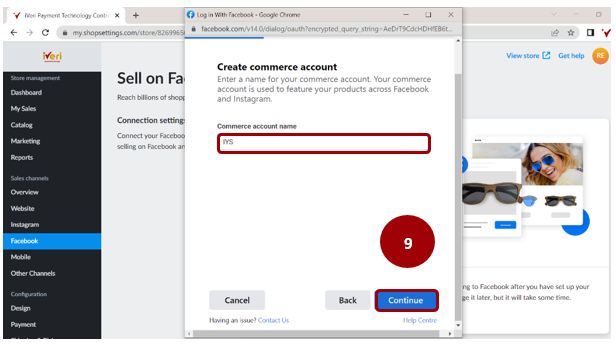
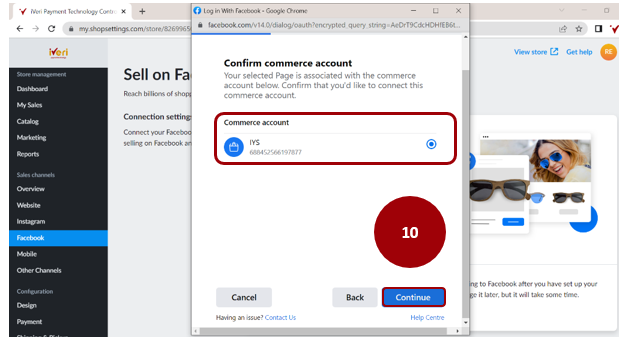
10.this step the Merchant will confirm the commerce account they would like to connect to their selected page.
Once the selection has been made, click on continue.
11. Here the user is able to check and confirm the settings for their e-Commerce account is account is captured correctly.
Once the user has completed their checks, they may proceed by clicking on ‘Continue’.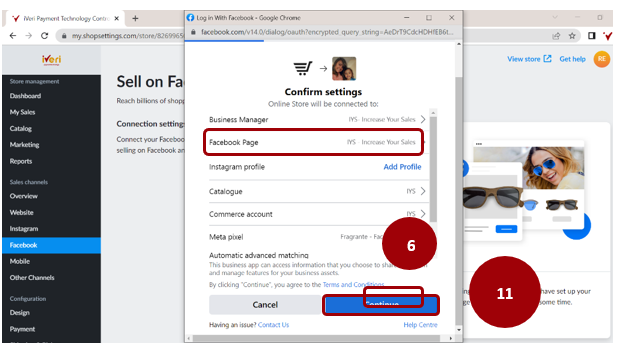
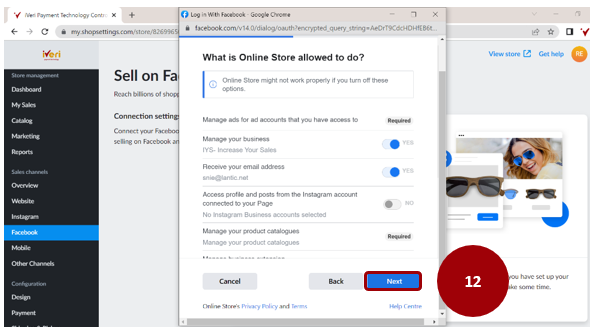
12. Here the Merchant will be able to manage the permissions related to their online social media store / account.
Click on ‘Next’ once you have completed the permissions.
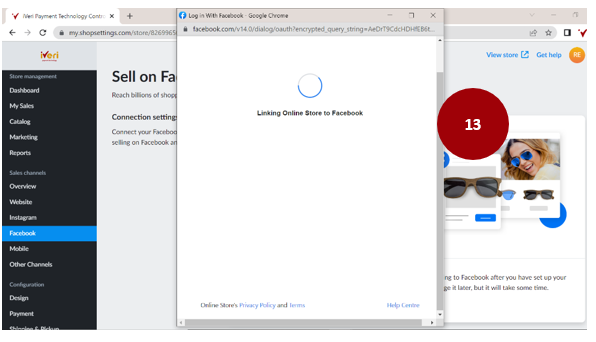
13. Wait a moment while your store is being linked to your preferred social media platform that you have selected.
14. You will receive the following notification pop-up that your store has been successfully linked.
You can now create an Ad for your social media store by clicking ‘Create Ad’, alternatively click ‘Done’.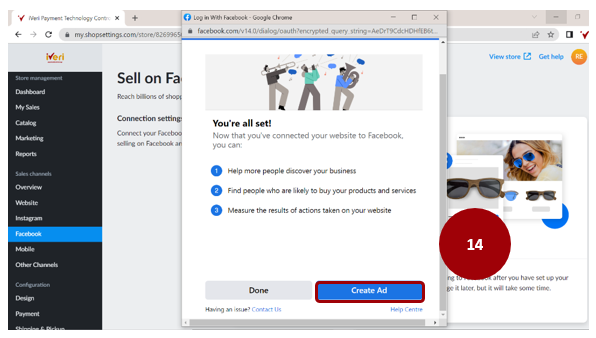
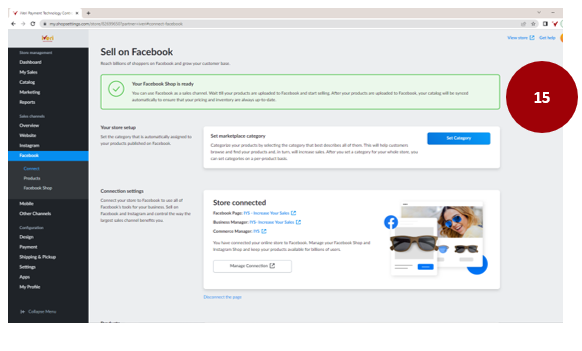
15. This is the notification you will received that your Facebook shop is ready and has been successfully linked.
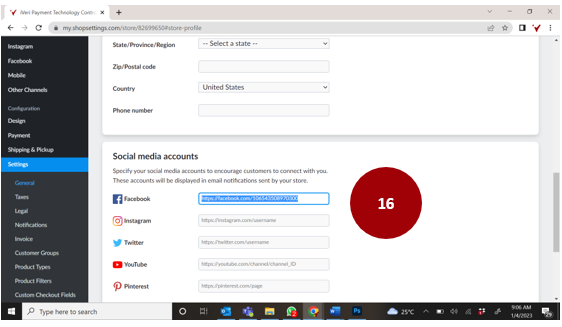
16. A merchant can also verify if their store has been successfully linked to their social media account by accessing the URL for their store.
Navigation Path: Settings > General > Scroll down to ‘Social Media Accounts’
The social media accounts URL will be displayed in e-mail notifications sent from your store.