3D Secure enablement on the Administration Website
The activation of 3D Secure hinges on the specific terms outlined in the merchant agreement with
'the Acquirer and their corresponding Sales Manager.
These requirements, however, vary based on the individual Merchant and the activation status of 3D Secure, applicable to the following solutions:
- Divert
- Lite
- Enterprise
Should the Merchant be enabled for 3D Secure, the following steps must be followed:
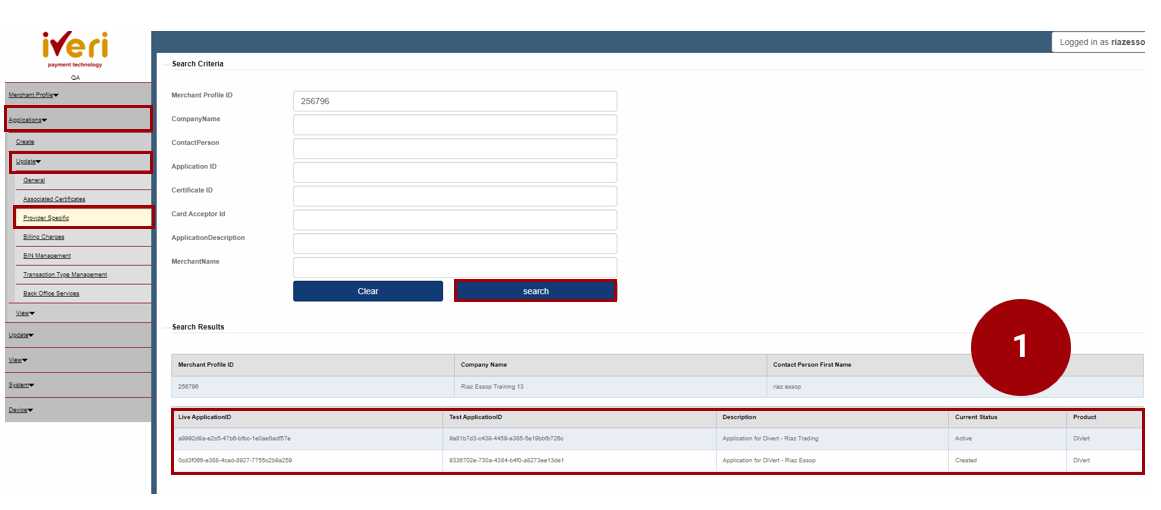
Navigation path:
Applications > Update > Provider Specific) the 3D secure configuration of functions is related to Diners, Visa, Mastercard & American Express.
1. The following screen will appear. The user will select the product to configure and enable for 3D Secure.
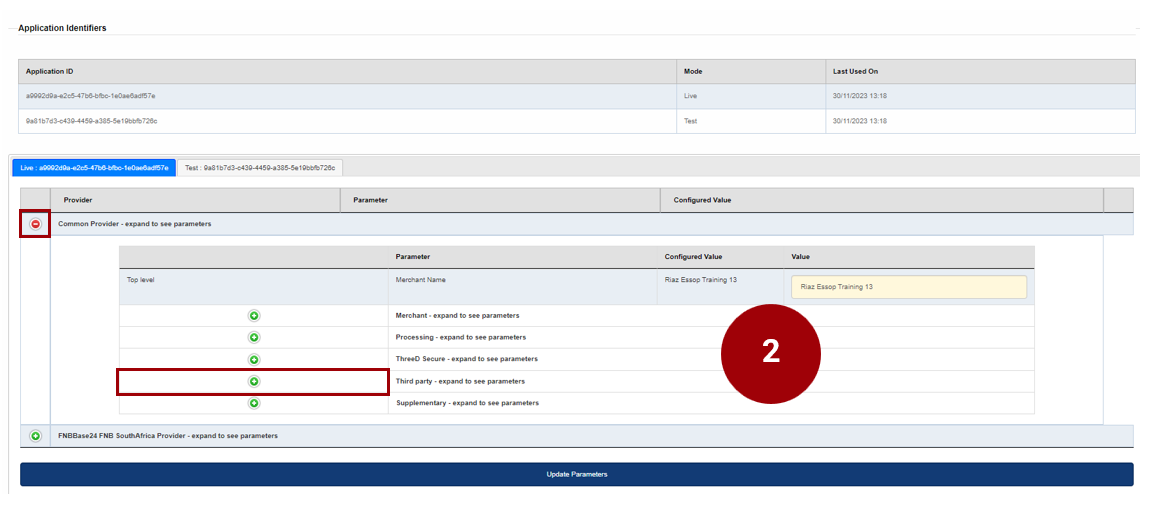
Navigate to the ‘Common Provider’ parameter and click on the expansion button.
Once you have expanded the ‘Common Provider’ tab, the following selections will appear.
2. From the list of parameters, please select the ‘Third party’ expansion button.
4. From the ‘ThreeD secure Parameter’ the user can now enable and configure 3D Secure for each Card scheme applicable to the merchant in accordance with the merchant agreement.
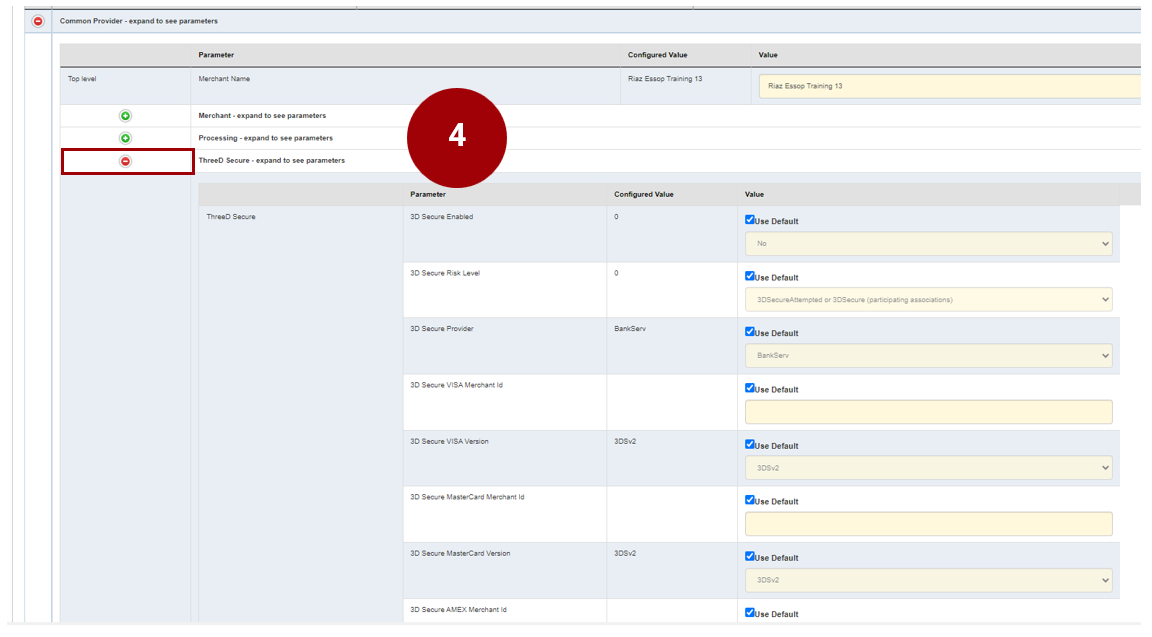
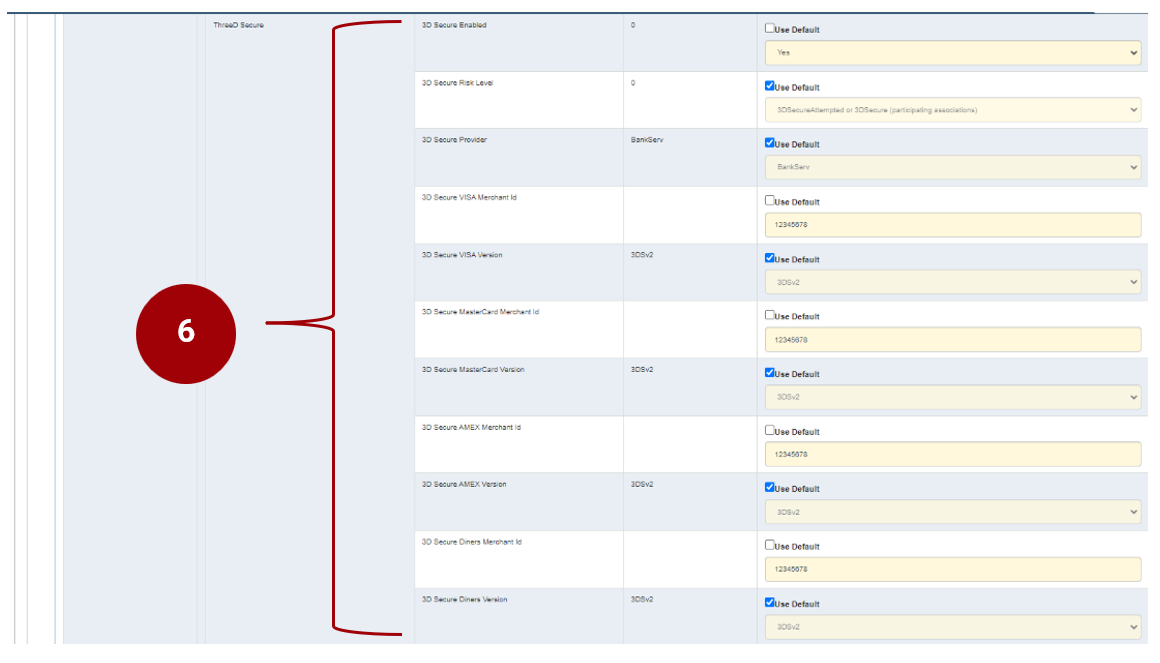
5. In order to configure the 3D to configure 3D secure, the following parameters would need to be configured:
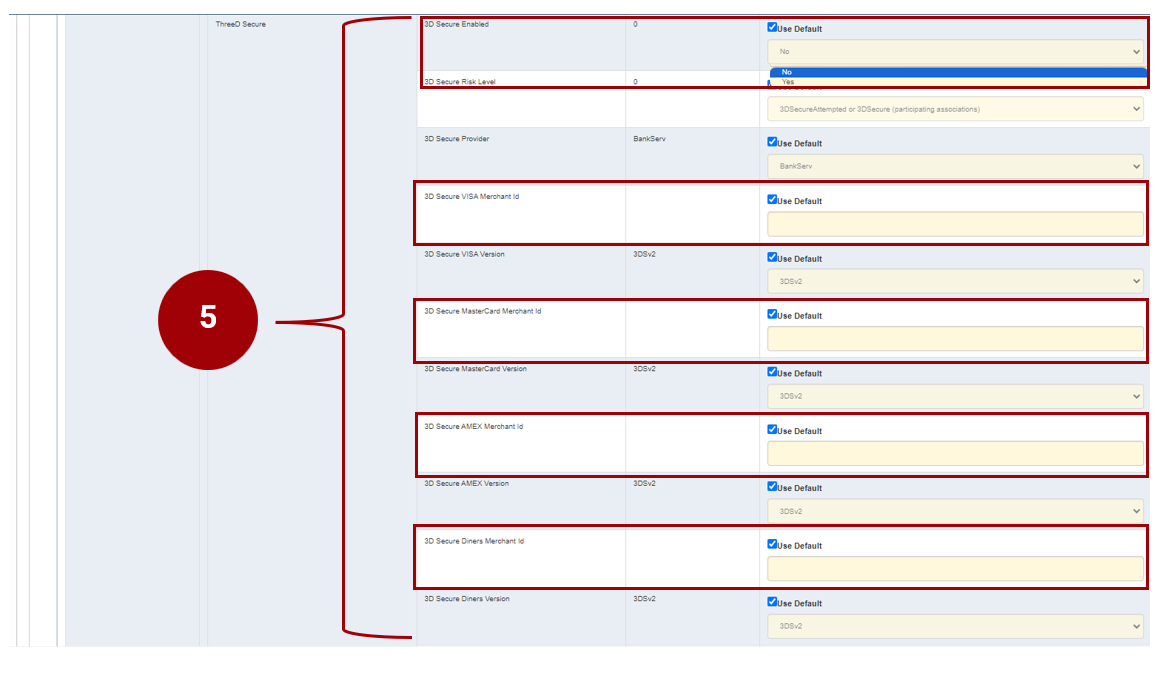
3DS Secure Enabled: Untick default and change drop down to Yes
3D Secure Risk Level, is dependent on the merchant agreement but defaulted to ‘3DSecureAttempted or 3DSecure (participating associations)’.
3D Secure Provider: Remains ticked & defaulted to BankServ.
Untick default and populate 3D Secure MasterCard Merchant ID.
Untick default and populate 3D Secure VISA Card Merchant ID.
Untick default and populating 3D Secure AMEX Merchant ID.
Untick default and populate 3D Secure Diners Merchant ID.
The screen shot demonstrates all the configurations for 3D Secure.
Lastly, ensure that all parameters have been captured accurately.
Click on the ‘Update Parameters’ tab to save changes.
