Google Pay™
Introduction:
Google Pay™ is a digital wallet service from Google that is expanding into e‑commerce to streamline online and in-app transactions. That allows customers to use payment cards saved to their Google Account to pay online without re-entering card details. In essence, Google Pay functions as a secure intermediary: when a customer checks out with Google Pay, the system provides the merchant with a tokenised version of the customer’s card data instead of the actual card number.
What is Google Pay in E‑Commerce?
In the context of e-commerce, Google Pay serves as a digital wallet checkout option that lets customers pay on websites or mobile apps using payment cards saved to their Google account. When a customer uses Google Pay on an e-commerce site, Google Pay provides the merchant (via iVeri’s payment gateway) with the customer’s payment credentials in a secure, tokenised form. This means the merchant never sees the actual card number; instead, a token is used to process the transaction.
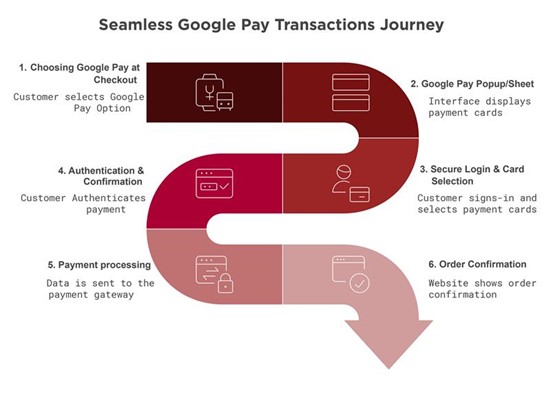
Google Pay Transaction Journey:
Which iVeri solutions supports Google Pay as a payment method?
- DiVert
- Lite
- Enterprise
The following considerations and prerequisites must be taken into account when a user is enabling prior to enabling Google Pay:
- The user must have an understanding of which iVeri Solutions Google Pay is applicable to
- A clear and thorough knowledge of the Merchant Onboarding process
- The merchant must accept and acknowledge the Google Pay Terms and Conditions within the BackOffice system.
- Understanding of 3D secure and the enablement process as outlined in this documentation.
Please note: 3D Secure is applicable if required by the merchant and agreed upon by the Acquiring Partner.
Enabling Google Pay as a payment method:
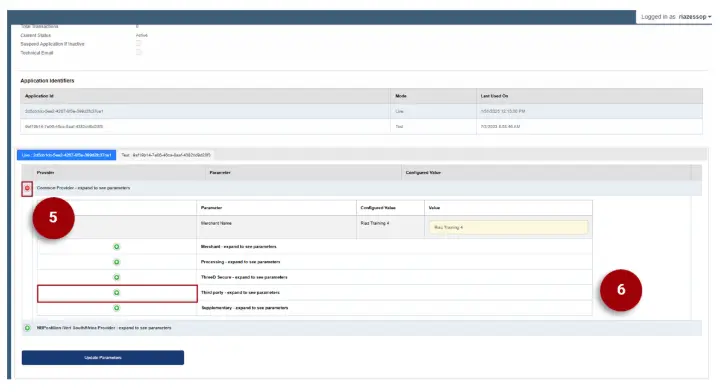
This enablement is very crucial to ensure Google payment reflects as a payment option when a Cardholder is in the process of making payment. Below we will illustrate step by step through visual presentation how to enable Google Pay for a merchant via the Administration Website:
1. From the homepage, navigate to: Applications >> Update >> Provider Specific.
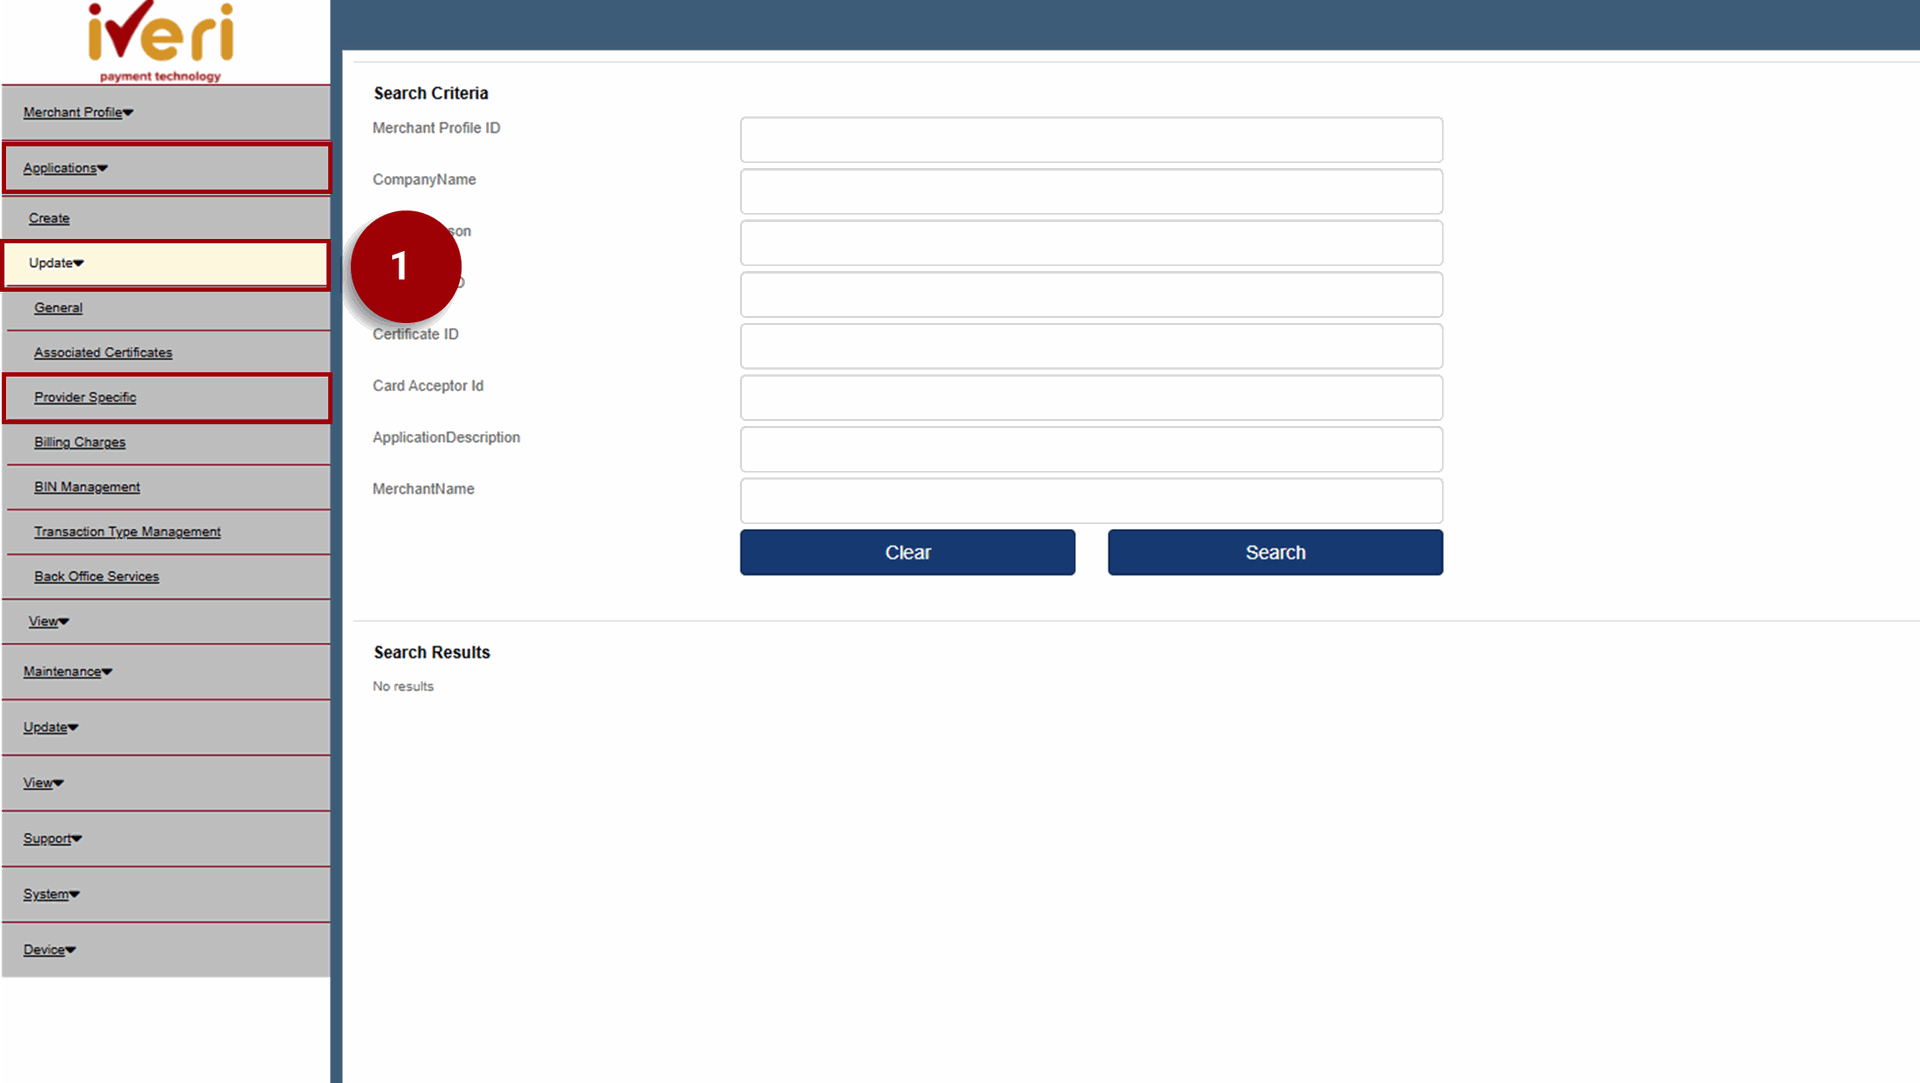
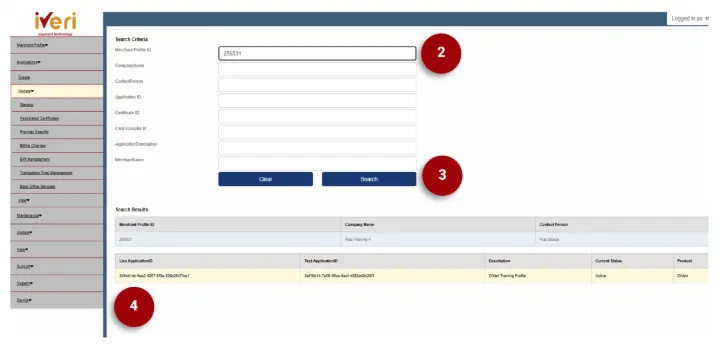
2. Capture the User Group ID in the ‘Merchant Profile ID’ field.
3. Click on ‘Search’ to return the search results for the Merchants Profile.
4. Navigate to and click on the ‘Live Application ID’ that has populated
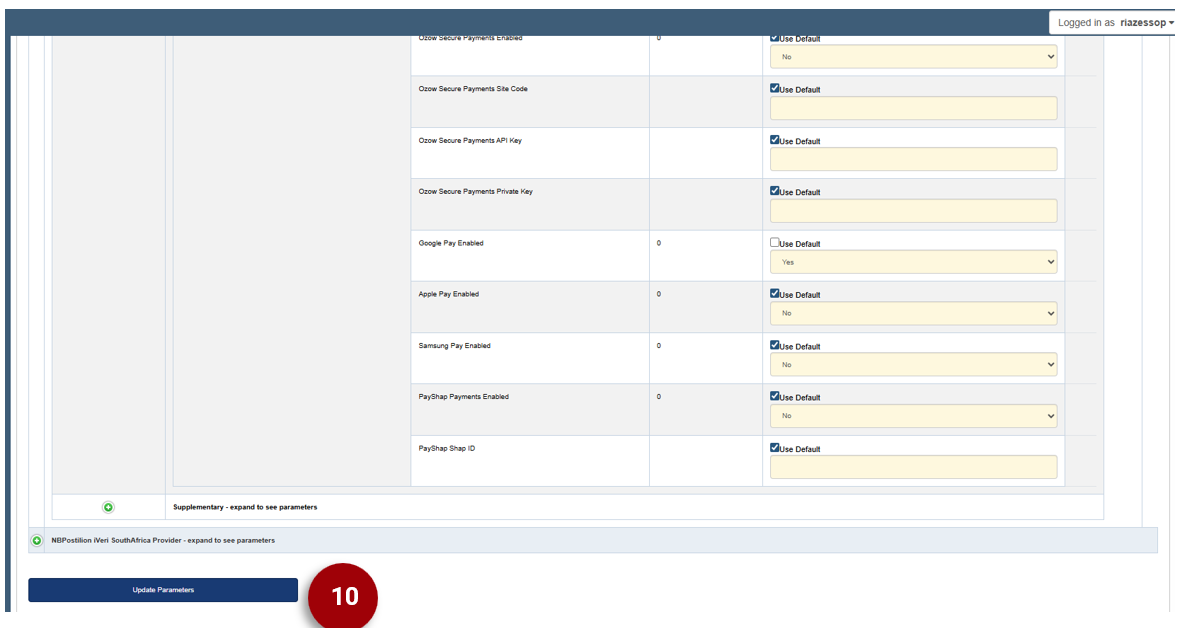
5. Under the ‘Provider’ value, expand on the ‘Common Provider’ parameter.
6. Navigate to the ‘Third Party’ parameter and click on the expansion button.
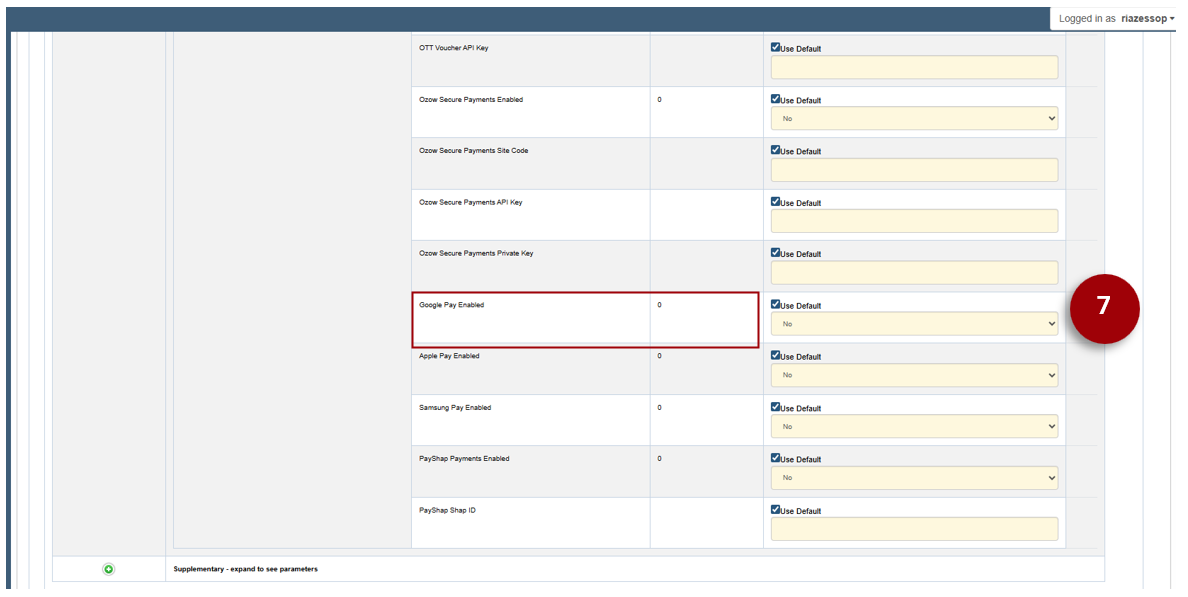
7. Scroll down to the ‘Google Pay Enabled’ configured value. The default configured value is set to ‘No’.
8. Untick the ‘Use Default’ tab.
9. From the dropdown, select ‘Yes’ as the new default value.
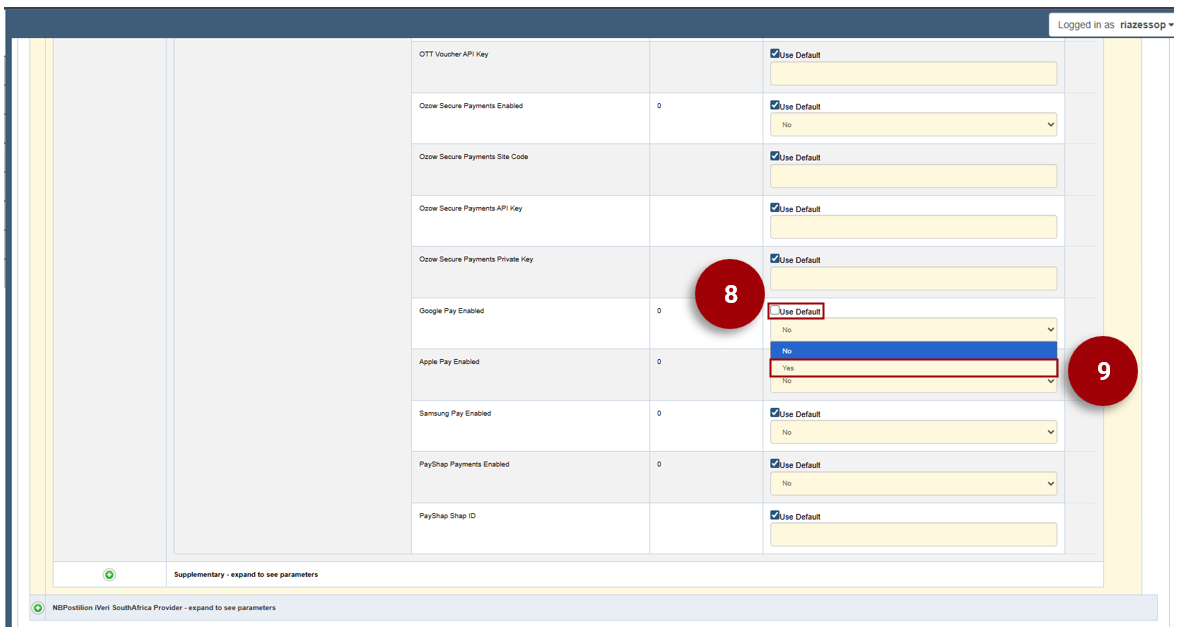
10. Lastly, to maintain the changes you have made, navigate to and select the ‘Update Parameters’ tab.