Avis Terminal and Device configuration process
Introduction
Welcome to the PosPort Training Session, this session is aimed to provide details on the processes and procedures that need to be followed when onboarding and configuring a PosPort merchant.
This process is important to ensure a merchant is accurately set up, so as the merchant can seamlessly process transaction as expected without any errors.
Assumptions
Actions assumed to be in place
- The Objectives of this learner guide are attainable on the assumption that the merchant profile already exist/captured on the Gateway Admin website by the acquiring bank.
- The Device/Terminal also needs to already be created and should exist on the gateway on request by the acquirer to assist@iveri.com .
- NEWPOS Devices have already been injected or loaded with the necessary keys and the related NEWPOS Application has been installed which should be done by the acquiring bank. (Reference the “Application Installation” Guide, and the “NEWPOS Key Injection” Guide)
- The acquiring bank should know how to operate the Device/Terminal, if not, please reference the process as stated on “User Guide 9220”.
- The acquiring bank should have access to the “PosPort Cardinal Backoffice” and appropriate permissions.
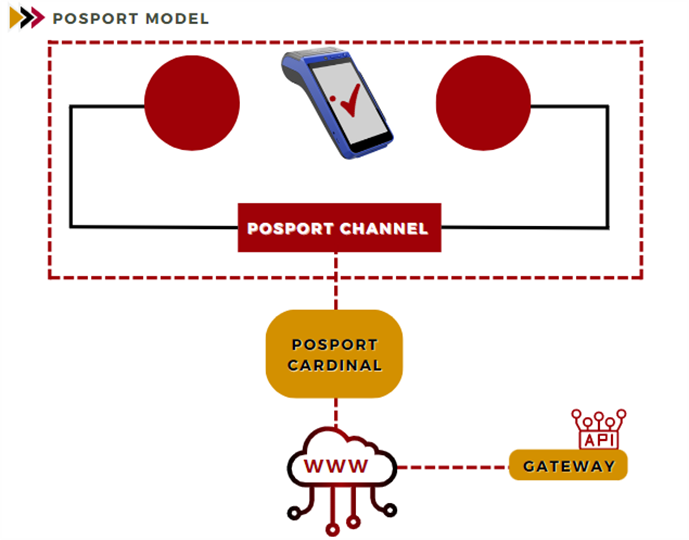
Model Representation
PosPort Model
Features
PosPort has a range of features which are as follows:
- Multiple transaction management
- Sale with Cash Back
- Sale with Tip
- Normal Sale without Cash Back
- Pre-Authorization
- Completion of Pre-Authorization
- Cash advance
- Balance enquiry
- Pin change
- Refund & Reversals
Additional functionalities supported:
- Multiple currency configuration set up
- Management of contactless / transaction limits
- Parameter download capability. (Changes effected by the acquirer will filter down by means of parameter download, which can be initiated at device level).
- BIN download capability
- Capability to remotely download software
- Acceptance of various cards as supported by the acquirer (e.g., Visa, Mastercard, contactless, Chip card, Chip card with Pin, Mag-strip with PIN)
Note:
Some of these features are dependent on the capability of the device used by the acquiring bank, however with the new POS devices, all the listed benefits are available.
Benefits of PosPort
These are the benefits that PosPort is able to provide:
- Key Management – management of keys used to encrypt sensitive data on the Gateway and device to align with PCI requirements.
- Parameter downloads – used to download all the parameters configured for the device.
- Remote Software Downloads – the terminal will automatically connect to the TMS to check for software updates and when a new update is available, it will update the software.
- Daily Device Report – A PosPort device report that is available and is generated daily for the acquirer to get a view of the activity of the merchant base.
- Multiple Currency Management – Where applicable acquirers can set different currencies to merchant specific devices.
- Limit(s) Management – Relates to transaction limits that are applicable on the currencies that are enabled for a particular merchant (i.e., Contactless floor limit).
Role Players
- iVeri – Capturing the devices on the gateway as and when needed.
- Acquiring Bank - handle the merchant take on, on the Gateway Admin and captures the merchant on the Acquirer systems. The Acquirer must also load the device on the PosPort Cardinal BackOffice.
- Touch Point –Device procurement and delivering or shipping of the terminal / devices to the acquirer, IVeri (through their RM) needs to be involved on this device delivery/shipment and request done between the acquirer and the requesting merchant. Key Injection, TouchPoint must set up (configure) the device before deployment. Device Maintenance is also done through TouchPoint which an agreement states the length of that agreement between the acquirers.
- Avis – Through the PosPort Cardinal BackOffice, merchants can register the devices they will be using in PosPort Cardinal. Once registered, the devices are ready for use, allowing merchants to start trading immediately—no additional configuration is
Note:
It must be noted that in all engagement or assistance that must be offered by TouchPoint, iVeri is the point of contact in order to relay the matter, this is done by sending an email to assist@iveri.com and also including the Relationship Manager.
Terminal Configuration Process
The Terminal Configuration process involves three key steps, which will be covered in
this guide:
- Device Management – Registering the device by capturing its serial number.
- Device Parameter Configuration – Setting up essential parameters for the device.
- Terminal Configuration – Finalizing the terminal setup for operation.
The below is a visual illustration of the device / terminal to be configured.
An example of a Wireless Terminal Device - NewPos 9220
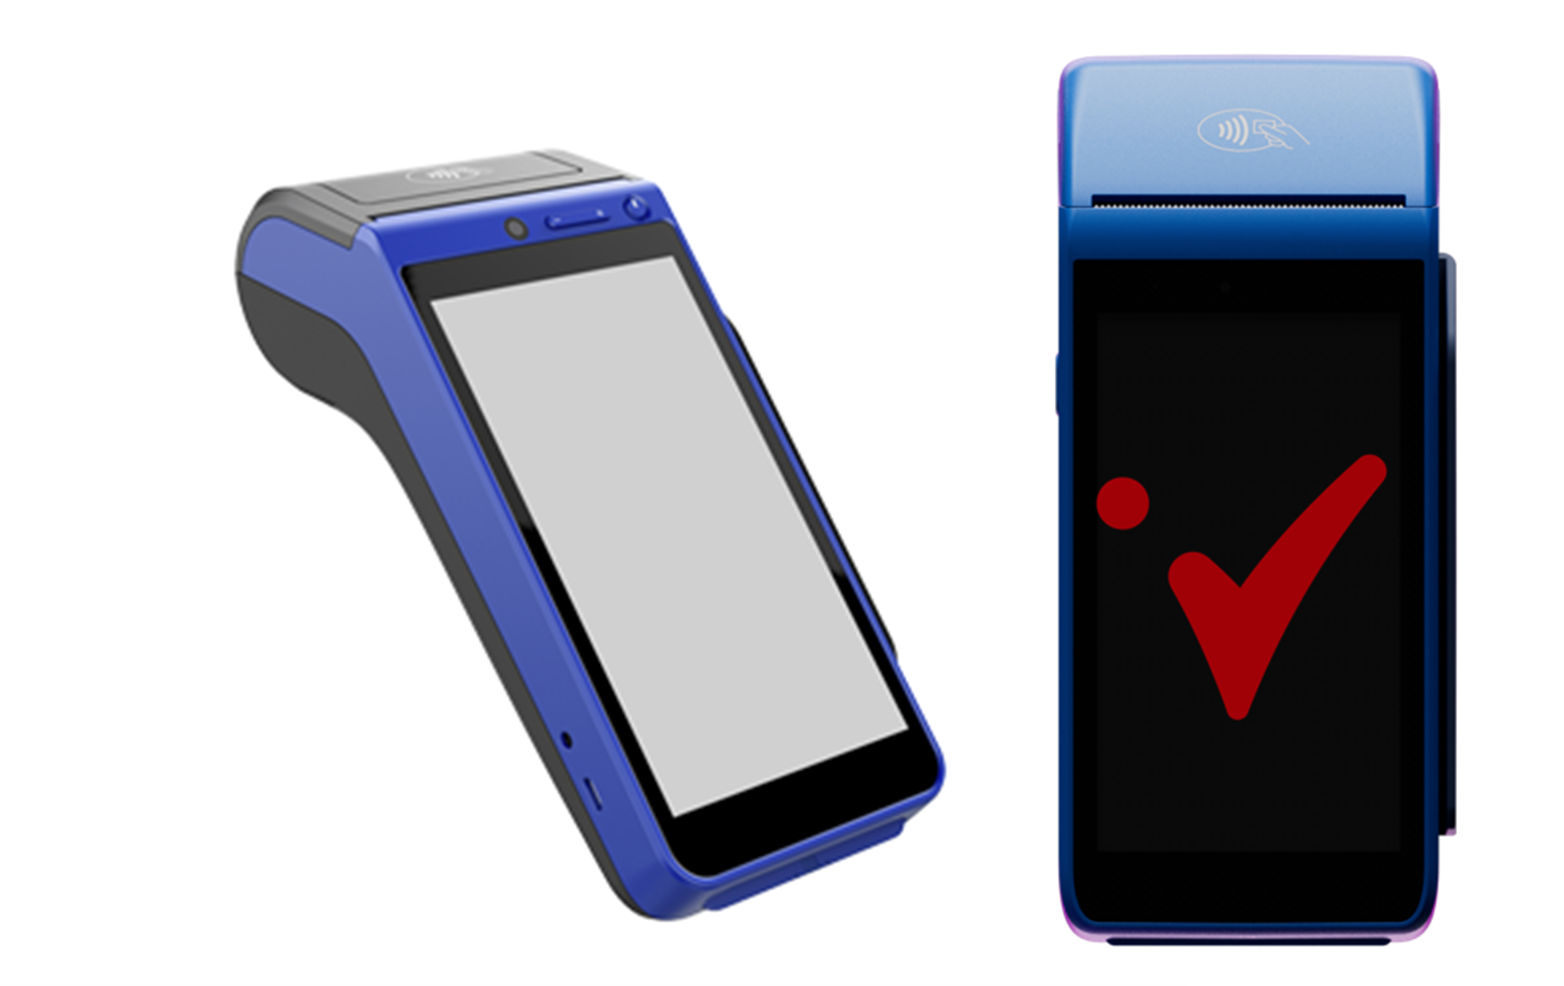
Note:
The Process is the same across all the devices and should be followed accordingly.
Capture & Configuration of a Terminal
Acquiring bank terminal Capture Process on the PosPort Cardinal BackOffice
Important: The terminal Configuration in PosPort Cardinal can only happen once the merchant has been loaded on the Admin Website.
First thing to be received by the user doing the configuration:
- Serial number on the back of the device
PosPort Cardinal Back Office Process
Important: The Process covered below indicates the Device management process and related Parameters that need to be applied in those devices, including the transactions permitted.
Step 1: Device Management
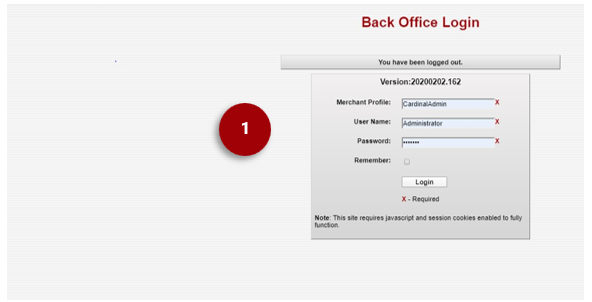
1. Log onto the PosPort Cardinal Back office:
https://backoffice.avis.indigo.iveri.com
Insert your user credentials generated upon being loaded as a user in the `PosPort Cardinal’.
Select ‘Login’ to access your profile.
To Navigate to Device Management:
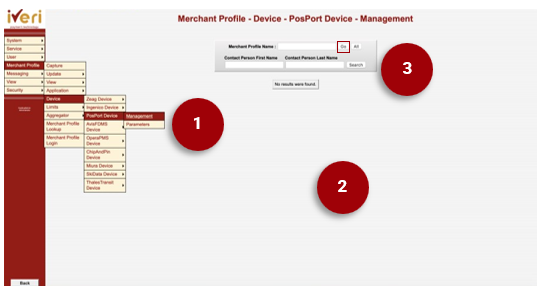
1. Hover-over to Merchant Profile > Device > PosPort Device > then select Management.
2. This is screen will appear
3. Insert your Merchant Profile Name/ Group ID. Click on ‘Go’.
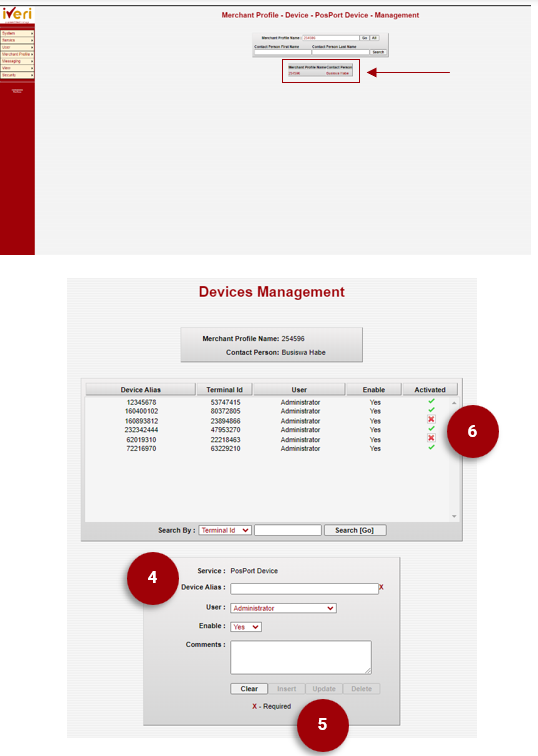
This screen will appear. Click on the populated profile as highlighted to populate the Device management for this Merchant Profile.
4. Capture the serial number on the back of the 9220.
5. Click on Insert.
This will then update the data in the block highlighted.
Note: The Terminal ID must be given to the person installing the POS device as they need to manually capture this number into the device.
6. Click on the X to activate the terminal on the Avis Cardinal, then select OK on the onscreen message, the X will change to a green tick, you can now
close this box. Lastly click on enable – change to ‘Yes’.
Step 2: PosPort Device Parameters
To Navigate to PosPort Device Parameters:
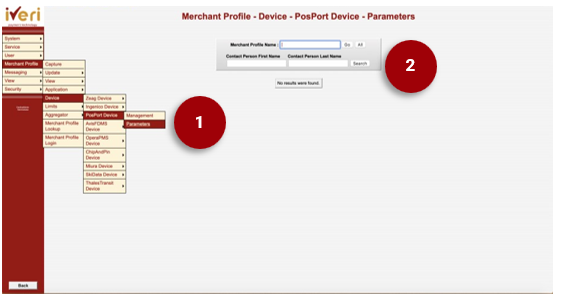
1. Hover-over to Merchant Profile > Device > PosPort Device > then select Parameters.
2. Enter the User Group ID in the Merchant Profile Name and Click ‘Go’.
3. You will get a result. Click on the number in the result box.
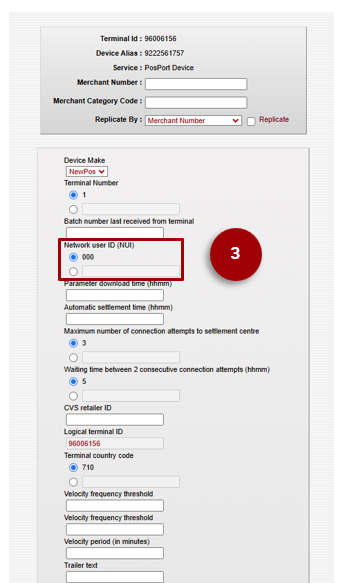
Merchant Number:
In the first section, the Merchant Number field, must be entered and must also be noted and given to the user installing the POS Device as they need to manually capture this number in the terminal.
Note: The Merchant number will be confirmed separately, as this may change in the future.
Merchant Category Code:
Capture the Merchant Category Code that was set on the Gateway.
The merchant Category code is a preset value: 3389.
Capture the Network user ID (NUI) to 018.
Terminal Number –This the Station ID that will be supplied by the Merchant. This is an AVIS Identifier which is required when processing payments and reconciliation.
Parameter Download Time – This value can be selected by the Acquirer according to their preference. Additionally, the application will prompt for a parameter download on a daily basis.
Trailer Text – This is set to Thanks for Using (put in your name)
Then Click on Update
Please note that any other parameters not mentioned, should be left as per its defaulted value.
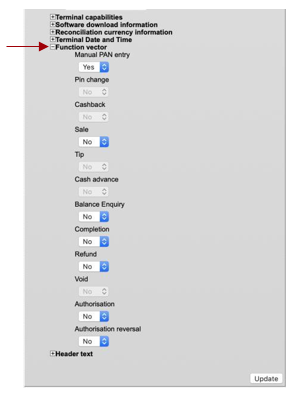
2. Function Vector
This is required for all devices to determine what functions the device will perform.
Transaction types set to “yes” are determined by permitted transaction types under merchant profile > merchant profile login > user > update >parameters.
The Preset Transaction Types are:
Sale
Void
Note: These preset transaction types have been agreed with AVIS and should remain as is.
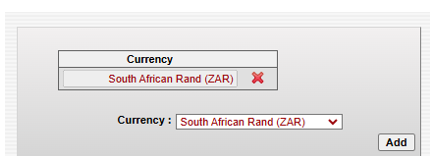
1. Enablement of Currency
Note: Default currency that must be displayed on the merchant’s new POS device should be configured.
Lastly, click on the Update tab to capture all changes made.
Step 3 – Device Configuration with MID and TID
It is important to note the following pre-requisites are in place before configuring a device:
- The device must have been captured on the AVIS Cardinal Server.
- Ensure that you have the correct Merchant ID (MID)
- The correct Terminal ID (TID) for the corresponding Serial number being setup
- Ensure the device has a working internet connection either via sim or WIFI connection
Select the settings icon within the Touch Point Payments application.
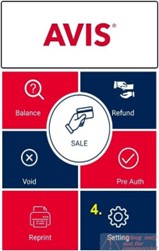
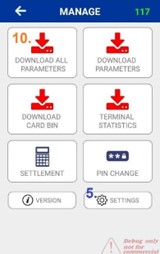
From the ‘Manage’ menu page, navigate and select the settings icon.
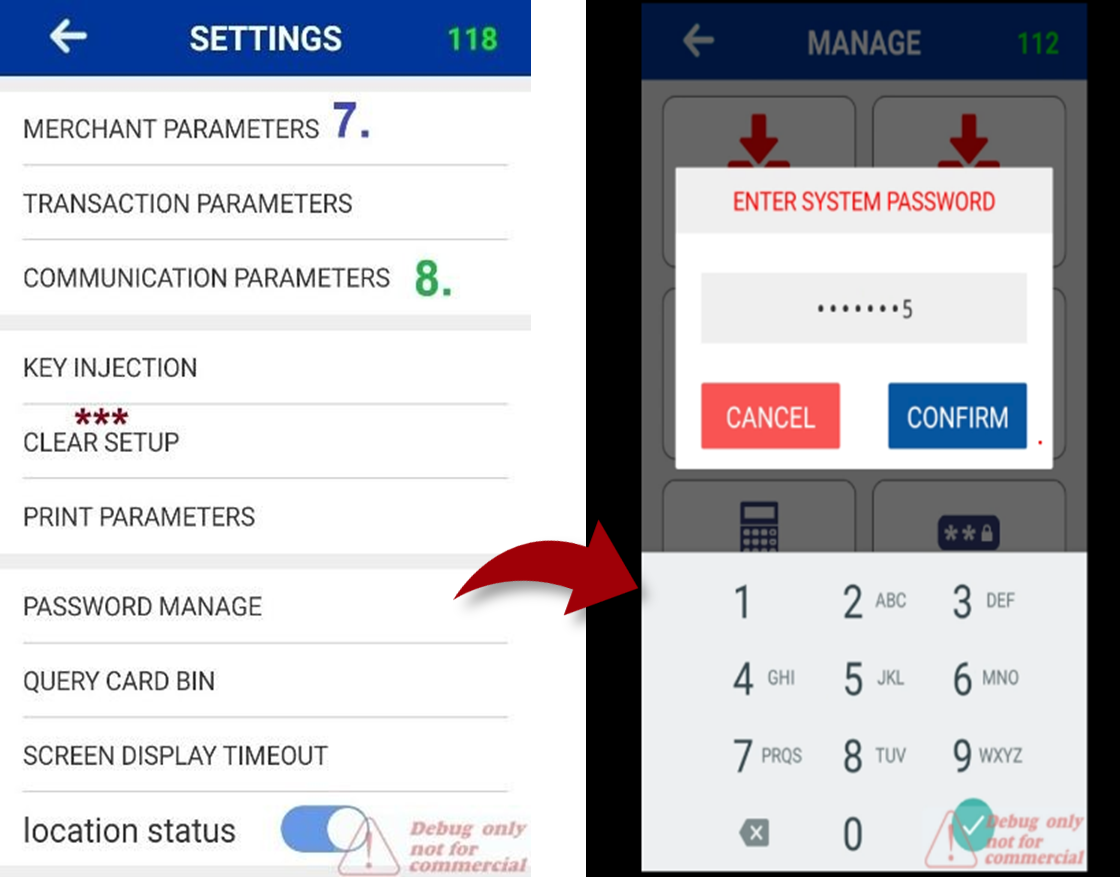
Select the ‘Password Manage’ tab and then enter the system password: 28472265.
Select ‘Merchant Parameter’ and update the values correctly, select SAVE to complete
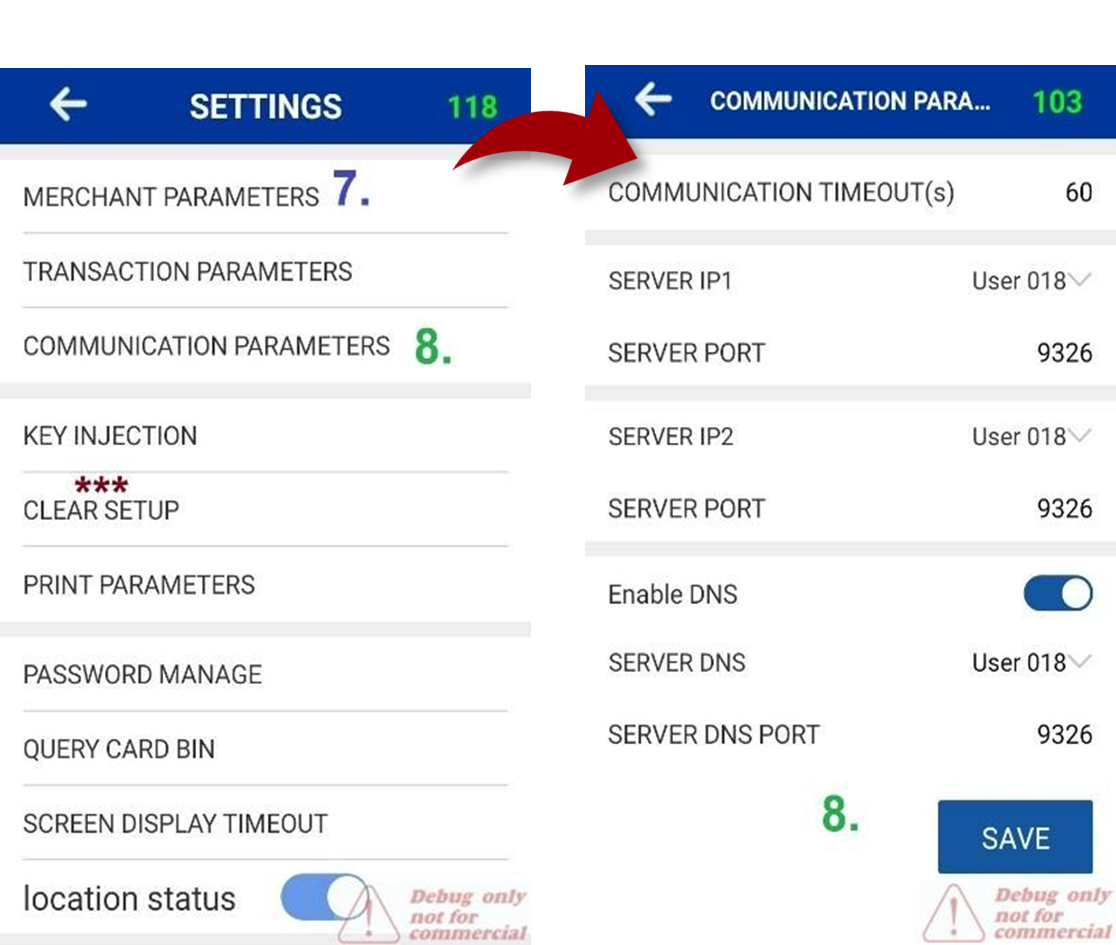
Select ‘Communication Parameters’, update all dropdown sub menus for IP2, IP2 and set DNS to user 018, then select SAVE to complete.
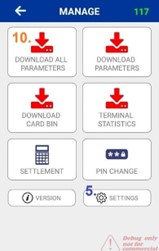
Navigate back to the ‘Manage’ page menu
10. Select ‘Download ALL Parameters’. Once successful, the U.I. and logo will change to AVIS theme, the device is now ready to transact.
Please note: If you are unable to change the MID and TID because the values seem locked, please select CLEAR SETUP and clear all options.
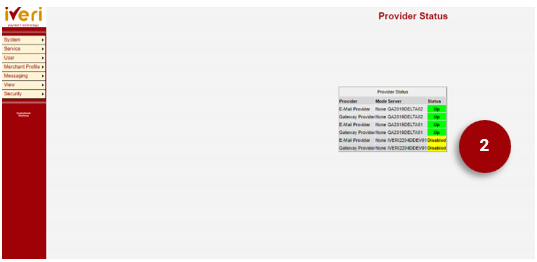
Provider Status
The provider status feature enables users to check whether the provider is currently operational or experiencing downtime. This view is crucial for users as it directly affects the merchant's capability to process transactions.
1. Navigation Path:
View > Provider Status
2. From the screen representation we can immediately see that the Provider status is ‘Up’ which means transactions can be processed.
Should the status appear as ‘Down’, transactions will not be able to be processed.