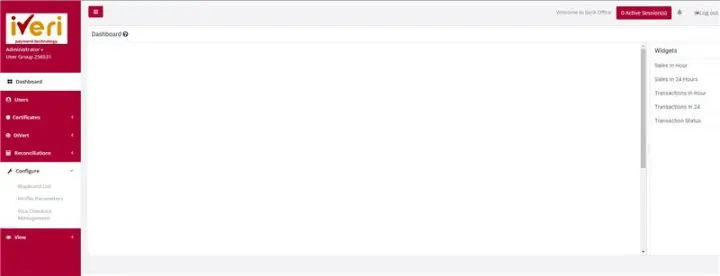
Configure
Black Card List
Purpose - This is used to create a list of credit card numbers that you do not want to accept. The iVeri gateway will always check your list before sending the transaction to the bank for processing. If the card number is on your list, the transaction will be rejected immediately. The reasons for putting card numbers into this list are at the discretion of each individual merchant and will only be rejected by your business.
Action:
Click on Configure, Black card List. This will bring up the following screen

Action:
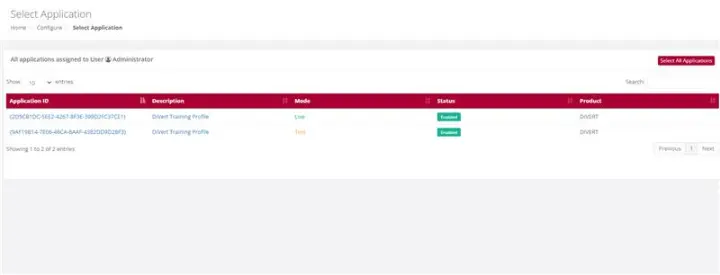
If you have more than one Application ID and want to capture the card number to be blocked for all your applications, click on Go next to All Applications at the top. If not, then click on the Application ID in the bottom section and the next page will be displayed.
Action:
Capture the credit card number you want to add to your Black Card List and click on Add. This will put the card number into your list. If you have more than one number to add, put in the next number and click on Add again. To save your entries, click on Submit.
You can also search for a number by typing it in and clicking on Search to see if a card that is being rejected is on your list. If the number is on your list, it will be highlighted. To remove a number from your list, enter the number, click on Search and when it is highlighted, click on Remove and then click on Submit to save your change (removal)

Profile Parameters
Purpose - To set the Security Parameters for all users in terms of their passwords, validity, suspension, and login notifications. These parameters can only be set by the Back Office Administrator.
Action:
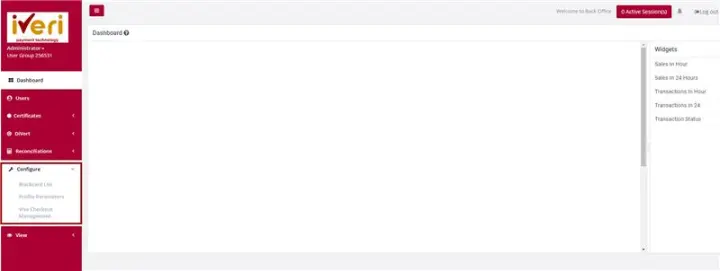
From the main menu, the user will navigate to: Configure - Profile Parameters.
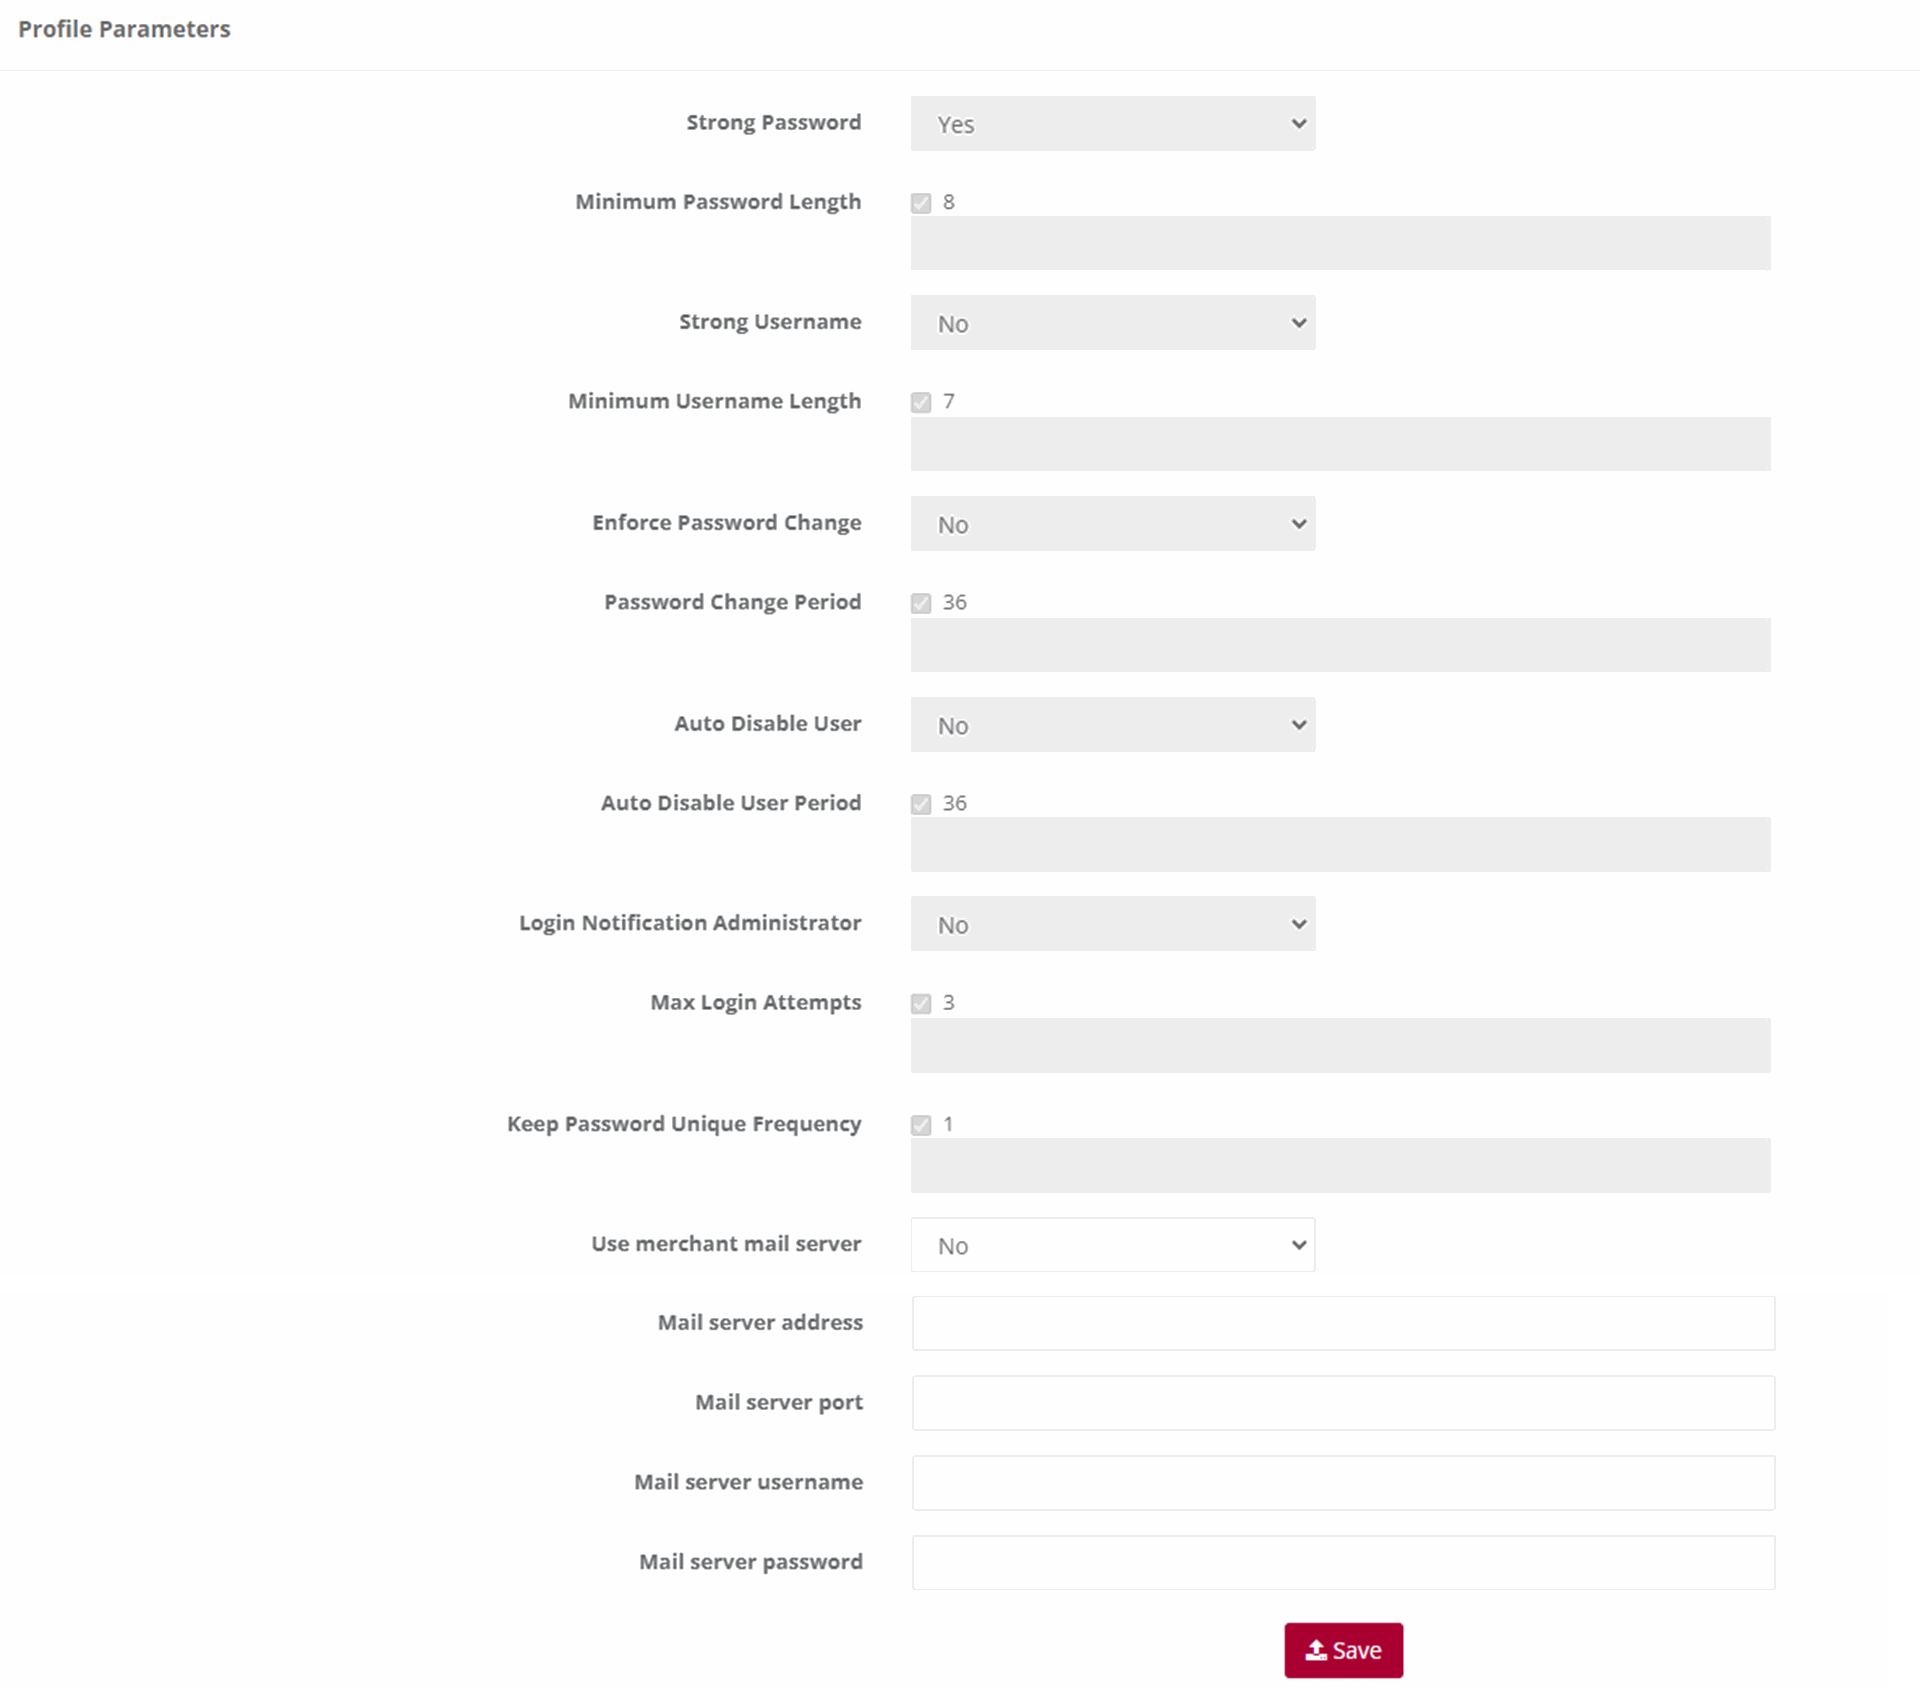
Action:This will display a form where you can modify the system defaults to meet your specific needs. Please note that any changes made to these defaults will apply to all users with access to iVeri BackOffice.
Note:
- Strong Password: The default is No. This means that the password can be anything if it is not less than the default minimum length. If you change the default to Yes, then the user’s password must be a combination of alpha/numeric and special characters also not less than the default minimum length.
- Minimum Password Length: The default is 6. You can change it to any higher number. If you do then this number will apply to ALL users.
- Strong Username: The default is No. This means that the username can be anything if it is not less than the default minimum length. If you change the default to Yes, then the username must be a combination of alpha/numeric and special characters also not less than the default minimum length.
- Minimum Username Length: The default is 4. You can change it to any higher number. If you do then this number will apply to ALL users.
- Enforce Password Change: The default is No. This means that users will never be forced to change their passwords. If you change the default to Yes, then all users will have to change their passwords in accordance with the Password Change Frequency that you set next.
- Password Change Frequency (days): The default is 60 days. This default is only valid if you change the Enforce Password Change default to Yes. If you do this then you can also change this number of days default to a longer period.
- Auto Suspend Users: This is used to automatically suspend a user from accessing Back Office after a set period. The default is No. If you want to suspend ALL, the users after a certain period of time then change the default to Yes.
- Auto Suspend After Period (days): The default is 60 days. This default is only valid if you change the Auto Suspend Users default to Yes. If you do this then you can also change this number of days default to a longer period.
- Login Notification to Administrator: This is used if the Administrator wants to know every time a user logs in to Back Office. The default is No. Simply change this to Yes and the Administrator will be notified by email every time a user logs in to Back Office.
- Keep Password Unique: This is used to set the period after which a user can use the same password again. The default is One Time. What this means is that when a user’s password expires after the default period of 60 days or the new period set by the Administrator, the user will have to enter a new password in accordance with the relevant settings above. They can then use their original password again after this period has expired. If you want the period longer before a previous password can be used again, select one from the drop down If you select Always, then the user will have to choose a new password every time their password expires.
- After changing any of the default settings above, click on Save to effect your changes. The Administrator can change any of the above at any time.
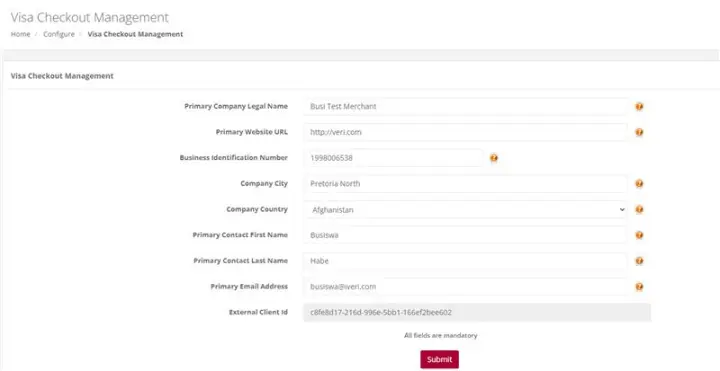
Visa Checkout Management
Visa Checkout Merchant Take-On
Merchants can also register for Visa Checkout to start accepting e-wallet payments from cardholders. To register merchants can mouse to the “Transaction Viewing Layout” section click on the “Reset Transaction Viewing layout dropdown, select “Visa Checkout Management” click the “Submit” button. A new page will be display and the merchant can be populating all the fields displayed on the below screen and Submit.
NB: The merchant will also need to notify the Acquiring bank that they need to be enabled for Visa Checkout.
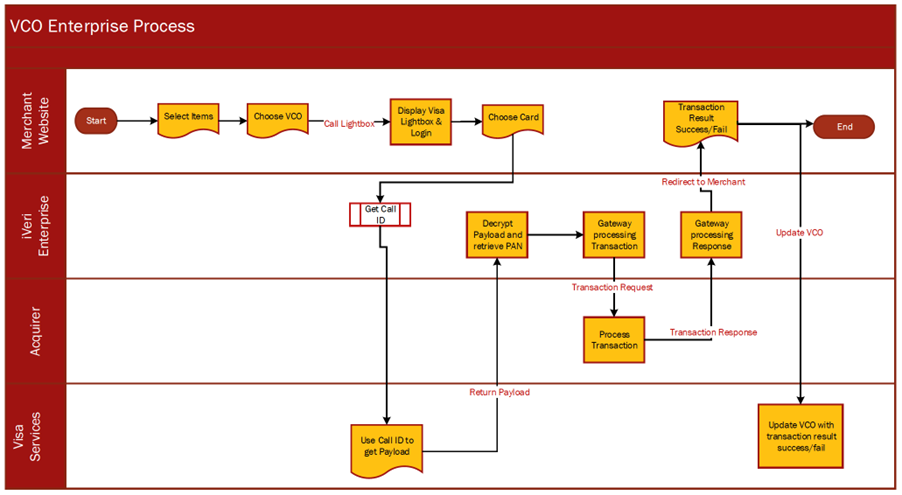
Process Flow in Visa Check-Out with enterprise
Visa Check-Out is a digital representation of a cardholders Visa Card. Cardholders can register their debit or credit cards by downloading the Visa Check-Out app. Once cardholders have their profiles and card details loaded in Visa Check-out, they are able to make purchases at merchants who are accepting with Visa Check-Out payments.
- Cardholder selects Visa Check-Out as payment method
- Enterprise Merchant calls Visa Light Box or Widget and presents it to the Cardholder to Login
- Cardholder Logins via Visa Light Box
- Cardholder selects a card and presses Continue
- Upon clicking Continue, Enterprise Merchant sends the Call ID to the iVeri gateway
- The iVeri gateway uses the Call ID to get the Payload from Visa services
- Payload is returned by Visa services to the iVeri gateway
- The iVeri gateway decrypts the Payload and retrieves the PAN
- The iVeri gateway sends the transaction request to the acquire for processing
- When a response is received, the iVeri gateway sends the transaction response to the enterprise merchant
- Lastly, the enterprise merchant updates Visa services with a failed or successful transaction response.
Note:
This functionality is not available by default, it is specific to an acquirer.
The process flow described below only show cases the interaction between cardholder, enterprise merchant, the gateway and Visa service