PayShap
Objective
The purpose of this document is to provide users with a detailed explanation of PayShap and outline how to enable it on the iVeri Admin Website using screen illustrations.
What is PayShap?
PayShap is a low-value, real-time digital payment service in South Africa that allows you to send and receive money instantly across different banks using just a cellphone number or an alias (ShapID), eliminating the need to share complex bank account details. PayShap is an instant interbank electronic payment scheme.
PayShap offers 3 services:
- Pay using Account details
- Instant payment using bank account details.
- Pay using ShapID or Shap Name/Business ShapID
- Instant payment using a ShapID (bank activated/linked cellphone number) or Shap Name/Business ShapID (ShapID for business account holders).
- PayShap Request
- Instant delivery of payment requests and instant payment of payment requests once approved.
You can only access PayShap via participating banks banking channels.
Which iVeri Products is PayShap applicable to?
- DiVert
- Lite
- Enterprise
Pre-requisites:
This guide is dedicated to the explicit process of enabling PayShap for a merchant through iVeri's Administration Website. It assumes that the user performing the PayShap enablement for the merchant possesses prior knowledge of the take-on process (onboarding process).
PayShap is a Non 3D secure digital payment service. The user would be required to configure another instance of the iVeri Product for a merchant.
Enabling PayShap on the Administration Website
Below we have the screen representations
Navigation Path:
Applications>Update>Provider Specific
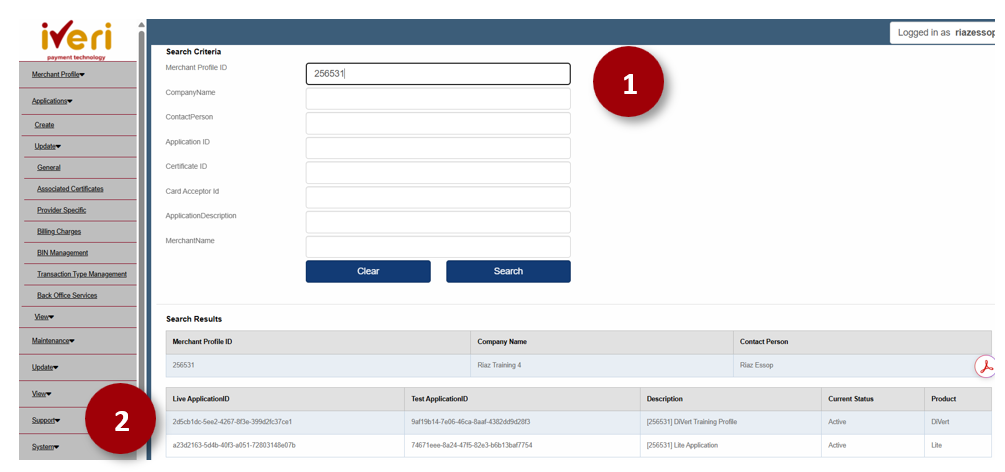
1. The user will capture the User Group ID and click the ‘Search’ tab.
2. This will populate the merchant Profile details. Select the applicable Application ID / Product.
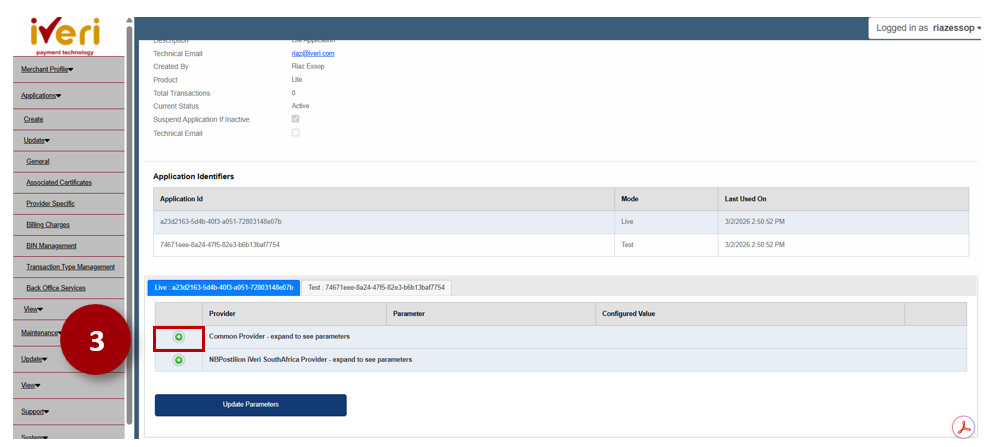
3. Expand on the ‘Common Provider’ tab.
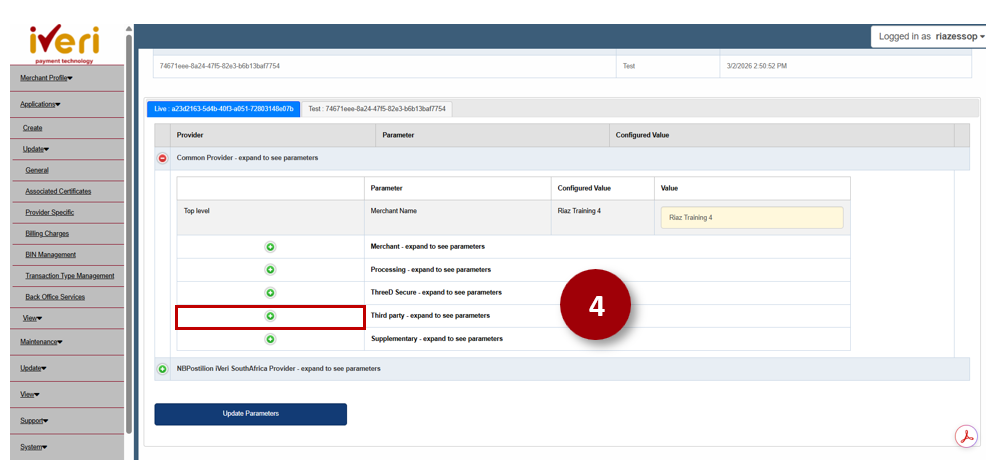
4. Navigate to and expand on the ‘Third Party’ parameter.
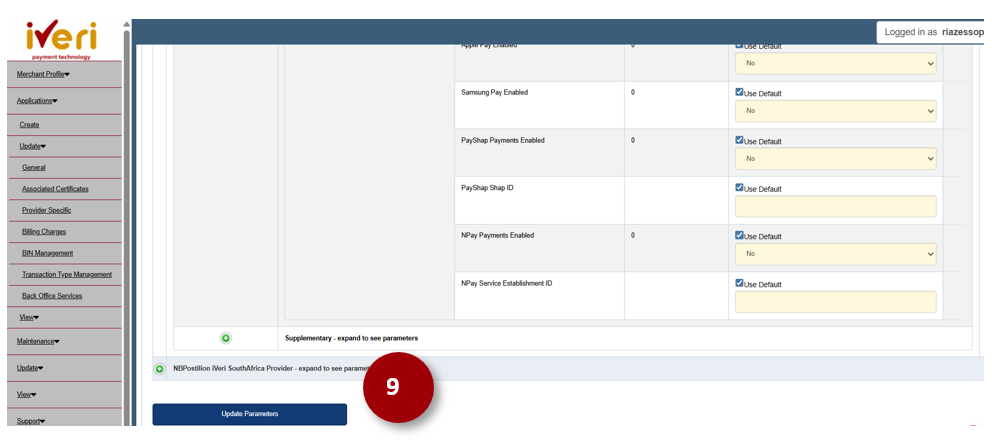
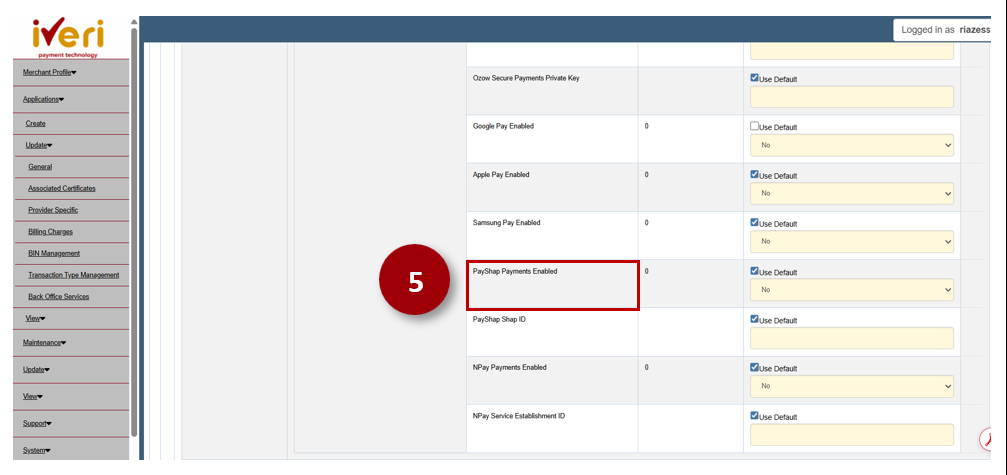
5. Scroll down to the ‘PayShap Enabled’ value. This value is defaulted to ‘No’.
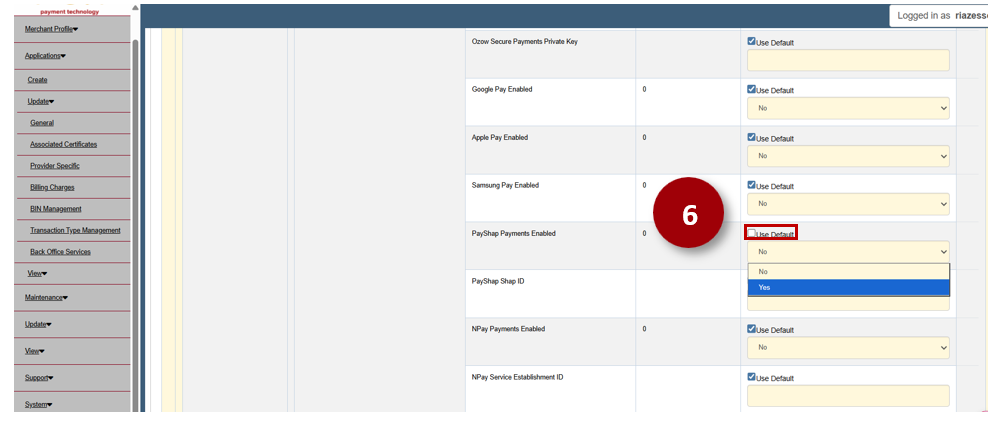
6. Untick the ‘Use Default’ box.From the dropdown, select ‘Yes’.
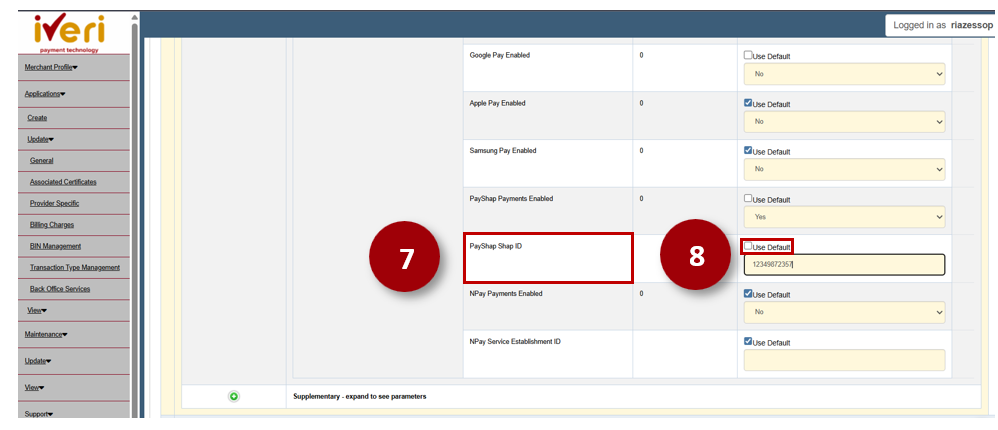
7. Next the user will capture the PayShap ID for the merchant. Untick the ‘Use Default’ box.
8. The user will now be able to capture the PayShap ID.
9. Lastly, to enable PayShap click on the ‘Update Parameters’ tab to maintain the changes you have made.